Beginning your journey as a beekeeper is an exciting and meaningful step, and few moments are as important as the first two weeks with a new hive. These early days determine how well your colony settles, grows, and builds the strong foundation it needs for the seasons ahead. A new hive requires attention, gentle guidance, and the right support tools — all while allowing the bees the space they need to orient and establish themselves.
This comprehensive guide walks you through the crucial steps, observations, and early maintenance tasks that shape a healthy future colony. With thoughtful care and the support of reliable equipment often used by beekeepers — including protective clothing, feeding tools, and hive essentials — your bees can begin their new chapter in the best way possible.
Why the First Two Weeks Matter So Much
When a colony is installed into a new hive, the first 14 days play a defining role in how well the bees adapt. During this period, the bees begin:
-
Building comb to house brood and store nectar
-
Orienting themselves to their new environment
-
Accepting the queen and supporting her early egg-laying
-
Gathering pollen and nectar to fuel colony development
By monitoring your hive during this window, you can identify problems early, measure colony progress, and make supportive adjustments without disruption.

1. Setting Up for Success
Choosing the Right Location
Where you place your hive influences everything — productivity, colony health, and your own convenience. A successful hive site includes:
-
Good sunlight, particularly morning sun to encourage early foraging
-
Protection from wind, achieved naturally or through windbreaks
-
Level ground, with a hive stand for moisture protection
-
Access to water, whether natural or beekeeper-supplied
-
Reasonable shade, preventing overheating during summer
A stable, sheltered setup helps the bees begin their work comfortably and safely.
Essential Tools and Protective Gear
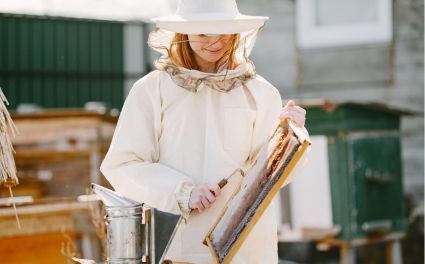
Winter or summer, early inspections require proper safety gear. Many beekeepers rely on a comfortable beekeeping Jackets during their first visits, providing sting protection without needing a full suit. When inspecting more active colonies or performing closer hive work, a complete beekeeping Suits offers full-body coverage.
Because early tasks involve lifting frames and handling hive components, wearing durable beekeeping gloves ensures safe grip and sting protection. Face coverings such as breathable beekeeping veils help maintain visibility and comfort while working near active bees. Lower-body safety is often overlooked, but beekeeping trousers protect legs from accidental stings during inspections.
If families are involved in early hive work, well-fitting beekeeping kids suits help younger helpers stay safe. Foot and ankle safety matters too, and many beekeepers use beekeeping ankle protection when working near the hive entrance. Some prefer distinctive colours such as pink bee Suits for improved visibility around the apiary.
Alongside protective clothing, simple tools such as hive tools, smokers, entrance reducers, and feeders — often part of curated Beekeeping Equipments like those in Beekeeping Equipments — help ensure smooth hive management from day one.
2. Caring for a New Bee Colony
Inspection Routine
The first two weeks require gentle yet intentional observation. Your inspection schedule may look like this:
-
First inspection (Day 3 to 5):
Look for early comb construction, signs the queen is present, and initial egg-laying. Bees should be actively exploring and organizing the hive interior. -
Second inspection (Day 10 to 14):
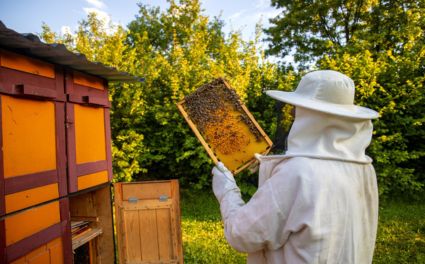
Look for growing brood patterns, nectar and pollen stores, and steady activity. This is when you should begin seeing larvae and capped brood.
Inspect calmly, use smoke lightly, and always wear protective gear for comfort and safety.
Supplemental Feeding
A new colony, especially one installed from a package, needs support to build comb and stabilize. Feeding is essential when natural nectar is limited.
-
Provide a 1:1 sugar syrup mixture to stimulate comb building
-
Use an internal feeder to avoid robbing
-
Refill regularly if bees are consuming syrup quickly
Internal feeders also reduce hive disruption and keep the bees focused on internal tasks.
3. Observing Hive Activity in the First Weeks
Paying close attention during the first two weeks gives you early insight into colony health:
-
Flight patterns indicate strong foraging activity
-
Pollen collection signals brood development, as pollen fuels larvae
-
Queen activity can be confirmed through eggs, larvae, and orderly brood patterns
Signs of trouble include disorganized behavior, queenlessness, or lack of comb building. If anything seems unusual, reviewing your setup or consulting with an experienced beekeeper can help you course-correct quickly.
4. Early Beehive Maintenance
The first two weeks are also a critical time to establish a clean, functional hive environment.
Pest Management
Even new hives can attract pests. Check for ants, small hive beetles, or wax moth larvae. Using traps or preventive tools — many beekeepers choose pest-control solutions found in collections from brands like OZ Armour — helps protect the colony while it is still growing.
Repair and Adjustment
Look for:
-
Warped or broken frames
-
Loose hive bodies
-
Gaps that could allow robbing or drafts
-
Excess burr comb that interferes with inspections
Small repairs in the first weeks prevent bigger issues later.
Ventilation Adjustments
Ensure the hive has proper airflow without exposing bees to wind. Adjust entrance reducers, inner covers, or vents to maintain the right balance.
5. Signs of Early Success in Your Hive
A thriving colony typically shows:
-
Active comb building
-
Neat brood patterns with eggs, larvae, and capped cells
-
Visible foragers returning with pollen
-
Calm, steady movement on the frames
These indicators mean your bees are orienting well, the queen is accepted, and the colony is growing as expected.
Benefits of Proper Early Care
Your effort during the first two weeks has a lasting impact:
-
Stronger colonies that withstand seasonal challenges
-
Faster comb building and earlier honey storage
-
Better disease and pest resistance
-
Higher beekeeper confidence as you learn to interpret colony behaviour
Early care builds long-term success.
Tips for a Smooth Start
-
Be patient and avoid over-inspecting
-
Keep a notebook with observations
-
Join local beekeeping clubs
-
Continue learning through trusted resources like read more blogs about beekeeping and educational guides in Learn Beekeeping
The more you learn, the more naturally hive management becomes.

Your Pathway to Beekeeping Success
The first two weeks with your hive set the foundation for a strong, productive colony. With consistent feeding, careful monitoring, and thoughtful maintenance — supported by durable equipment and protective apparel often chosen from trusted brands like OZ Armour — you give your bees the best possible start to their new home.
Conclusion
In the early days of beekeeping, every small action has a big impact. Through consistent inspections, proper feeding, careful maintenance, and the use of high-quality protective gear, your colony can establish itself quickly and grow with strength. These first two weeks build the momentum your hive needs to thrive throughout the year. With patience, dedication, and reliable tools, you’re well on your way to a rewarding and successful beekeeping journey.


