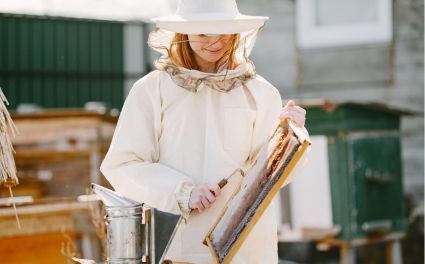
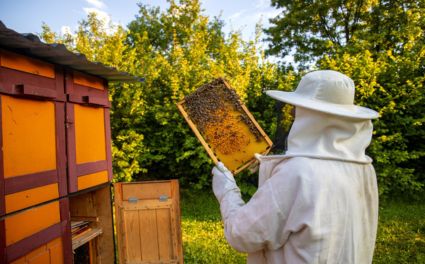
Starting a new honeybee colony can be one of the most fulfilling experiences for both beginner and experienced beekeepers. With the right approach and a little preparation, you’ll help your bees settle into their new home smoothly.
This guide breaks everything down into simple steps, from the tools you’ll need to the process of installing your bees.
Let’s dive in!
Why Proper Bee Installation Matters?
Installing your honeybee colony properly is key to their survival and success. When done right, your bees will quickly adjust to their new environment, start building comb, and begin foraging.
Plus, being part of this process offers a unique connection to nature and a deeper appreciation for these incredible creatures.
Why Does It Pay Off?
-
Healthy Hive Development:
A proper start minimizes stress and encourages growth.
-
Boosted Pollination:
Thriving bees play a vital role in pollinating flowers and crops.
-
Faster Honey Production:
A well-adjusted colony gets to work producing honey sooner.
-
Hands-On Learning:
You’ll gain valuable insights into the fascinating life of bees.
What You’ll Need: Tools And Gear
To make the installation process safe and efficient, having the right equipment is essential. That’s where OZ Armour’s high-quality beekeeping tools come in handy.
Essential Beekeeping Tools:
- Protective Gear: Safety is your top priority. OZ Armour’s ultra ventilated beekeeping suit provides excellent protection and comfort.
- Hive Tool: A must-have for beekeeper's starter kit and handling frames. Our hive tool is both durable and easy to use.
- Smoker: Calming your bees with smoke makes handling them safer. Choose a reliable bee smoker to keep the process smooth.
- Gloves: OZ Armour premium beekeeping gloves protect your hands without sacrificing flexibility.
- Brush: A soft bee brush helps you move your bees gently without harming them.

How To Set Up Your Honeybee Colony? A Simple Step-by-Step Approach
1. Preparing The Hive
Before your bees arrive, make sure the hive is ready and welcoming. Here’s how:
Choose The Right Location:
Select a site with plenty of sunlight, protection from strong winds, and proximity to water and flowers.
Set Up The Hive:
Place the hive on a sturdy stand to keep it off the ground, reducing moisture and predator risks.
Inspect The Frames:
Install foundation or pre-waxed frames in the brood box to provide a structure for the comb building.
2. Arrival And Inspection
Once your bees are there, follow the following initial actions:
Inspect The Package:
Make sure the bees are alive and active. Check the queen's cage to confirm the queen’s health.
Keep Them Cool:
Avoid leaving the bees in direct sunlight to prevent overheating.
3. Installing The Bees
This is the heart of the process. Follow these detailed steps:
Calm The Bees:
Utilize the smoker to puff a tiny amount of smoke at the entrance to the package. By hiding their pheromones, this soothes the bees.
Open The Package:
Remove the lid and feed carefully. Take out the queen cage and set it aside temporarily.
Release The Bees:
Gently shake the bees into the hive body. You can also leave the package inside the hive and allow the bees to move out on their own. Position the queen cage between two central frames, making sure the candy plug faces upward.
Close The Hive:
Place the inner cover and outer lid securely. Reduce the entrance to protect the colony while they acclimate.
4. Monitoring The Colony
After installation, your role as a beekeeper continues with regular monitoring:
Check The Queen’s Release:
Within 3-5 days, make sure the queen has been released and is moving freely.
Inspect For Comb Building:
Verify that the bees are drawing out comb on the frames.
Provide Supplemental Feeding:
If necessary, supply sugar syrup to support the colony’s initial growth.
Managing Hive Frames For Optimal Growth
Hive frame management is a critical aspect of maintaining a healthy colony. Properly positioned frames make sure effective comb building and honey storage.
- Spacing: Maintain even spacing between frames to allow bees easy access.
- Rotating Frames: Periodically rotate frames to encourage even comb distribution.
- Removing Burr Comb: Use your hive tool to scrape off any excess comb made in unwanted areas.
Whata Are The Usual Challenges And How To Overcome Them?
-
Queen Issues
If the queen isn’t accepted by the colony, replace her promptly with a healthy queen.
-
Pests And Predators
Install a mouse guard and regularly inspect for mites or beetles.
-
Weak Colony Growth
Provide additional feeding and make sure the hive is in an optimal location.
Ready, Set, Buzz!
Installing a new honeybee colony can be a fulfilling and enriching experience when done correctly. By following this guide and using high-quality tools and gear from OZ Armour, you’re setting yourself and your bees up for success.
Remember, every colony is unique, so observe and adapt as needed.
Get started today and let your apiary flourish!
Conclusion
Installing a honeybee colony is a rewarding experience that requires proper planning, the right tools, and ongoing care. By following the steps outlined in this guide, you can ensure your bees adjust well to their new home, leading to healthy hive development, efficient honey production, and thriving pollination. Challenges may arise, but with patience, regular monitoring, and high-quality tools like those from OZ Armour, you’ll navigate them successfully. Every colony is unique, offering an incredible opportunity to learn and connect with nature. Start your beekeeping journey confidently and enjoy the joys of nurturing your first honeybee colony.


